Monday, December 19, 2011

Mint Chocolate Meringue Cookies

4 egg shites at room temperature (must make sure they are room temp)
1 teaspoon cream of tartar
1 1/3 cup sugar
1/2 teaspoon mint extract (or you can use a bit less)
2 drops of green food coloring (opt)
1 cup mini chocolate chips (opt)

  1. Preheat oven to 350 degrees
  2. Line 2 baking sheets with parchment paper and set aside
  3. In a bow beat egg whites with an electric mixer until foamy
  4. Add the cream of tartar and beat until fluffy, but not stiff.
  5. Add sugar slowing 2 tablespoons at a time.
  6. Contintue beating until all the sugar is added.  Add mint extract and food coloring and beat until meringue is shiny and firm.  It should for stiff peaks.
  7. Gently fold in miniature chocolate chips.
  8. Drop by tablespoon carefully onto baking sheets or use piping tool
  9. Place in pre-heated oven and turn off oven.  Leave in the oven for at least 2 hours or overnight until cookies are crisp and dry.  The meringue cookies willcook from the heat of the turned off oven.
  10. Store in an airtight container.
  11. Serve and enjoy.
To change the flavor I just OMITTED THE MINT FLAVORING put a 3 ounce package of jello in the measuring cup then added the sugar until it reached the required amount.

Monday, September 19, 2011

Fall Fruits and Vegetables

Acorn Squash
  • Look for blemish-free, dull green rind.
  • Can keep up to two months.
Apples
  • Choose firm, unblemished apples.
Butternut Squash
  • Feel for top-heavy squash.
  • Check skin for blemishes.
Cauliflower
  • Look for tightly-packed florets.
  • Check for yellow spots before buying.
  • Keeps up to five days, refrigerated.
Figs
  • Squeeze to test for firmness - not too soft, not hard.
Grapes
  • Check for grapes to be plump and vibrant-colored.
Kale
  • Look for dark green leaves (may have tinges of purple).
  • Find kale with sturdy stems.
  • Do not store longer than a week.
Mushrooms
  • Avoid blemished or dried out mushrooms.
  • Store in paper bag for the right humidity.
Parsnips
  • Shouldn't look withered or limp or have too many small roots.
  • Can be stored up to four weeks in refrigerator.
Pears
  • Find pears free of blemishes or bruises.

Pomegranate
  • Whole pomegranates should feel heavier than they look.
  • Can be stored up to three months in the fridge.
Pumpkin
  • Pick a pumpkin with a tough skin that can't be scratched by your thumbnail.
Rutabega
  • Look for smaller rutabegas, as they will be sweeter.
  • Check for an unblemished skin.
Sweet Potatoes
  • Avoid sweet potatoes with black spots.
  • Make sure they're not shriveled.
Swiss Chard
  • Leaves should be vibrant and green.
  • Avoid wilted chard.
Turnips
  • Select turnips smaller than three inches in diameter.
  • Store in a plastic bag up to one week in refrigerator.

Sunday, September 18, 2011

Raw Milk Pumpkin Latte


You first need to make some pumpkin butter:
4 cups cooked pumpkin  (or 2 cans organic pumpkin)
How to cook a pumpkin
3 Cinnamon sticks
6 Whole Cloves
2 Tbs Pumpkin Spice
3/4 cups Pure Apple Cider (use local cider whenever possible avoiding apples from out of the US)

Bring to a boil and allow all flavors to blend together as you stir. You can put this in a jar for your next recipe. For this treat we'll take 4 Tablespoons out to use in our latte and put the rest away in the refrigerator. Leave the cinnamon sticks in whole to continue releasing flavor.


Take some wonderful farm fresh raw milk and remove just enough cream (1 and a half cups) to make your whip cream for the top of your drink. Shake the rest of the cream into your milk before measuring out so you get the full rich flavor this drink is meant to offer.

Put your cream along with 4 tsp of organic cane evaporated sugar into your mixer and mix up into whip cream.

Meanwhile, take the 3 cups raw milk and heat it up on the stove making sure to add:

4 TBS of your pumpkin butter
3 tsp of pure vanilla extract
4 tsp of organic cane evaporated sugar

Bring to desired temp to drink.. not too hot.

Before you pour the latte mixture into your cup add 1/2 cup of very strong coffee. Then pour into your cup (this makes three Latte's) add a large serving of your fresh made whip cream to top it. Sprinkle a pinch of pumpkin spice on the top add a cinnamon stick and serve!

Recipe adapted from a recipe by AZURE STANDARD


Wednesday, September 7, 2011

Master Cooking Day(s) - Using What's in the Garden & Freezer

Essential Foods:
3.5 pounds Grass-Fed Ground Beef
2 pounds Pasture-Raised Ground Pork
2-4 pounds Grass-Fed Beef Short Ribs
1-2 packages Free-Range Chicken Boney Pieces
1/2 cup dry bread crumbs (gluten-free if you are intolerant)
2/3 cup raw milk
4 large free-range, organic eggs
1 cup grated parmesan cheese
3/4  cup fresh chopped flat-leaf parsley
2 teaspoons kosher salt
Freshly ground black pepper
2 cups uncooked macaroni
56 ounce, crushed or diced tomatoes
2 cups tomato Sauce
16 cups Beef stock/broth
2 cans Canellini Beans
2 Teaspoons Italian Seasoning
48 meatballs
11 carrots, sliced
7 onions, diced
12  celery stalks, chopped
5 cups green beans, fresh or frozen
18 cloves diced garlic
1 small green pepper
4 pounds diced tomatoes
1 cup diced zuchinni (opt)
2 Tablespoons Extra Virgin Olive Oil.
1 1/2 cup chicken stock
1 pound Kielbassa or polish Sausage Cut into bite size pieces
(I used 1/2 pound pasture-raised Pork Polish Sausage and 1/2 pound grass-fed lamb brats)
2 Teaspoons dried oregano (or 4 teaspoons fresh)
2 teaspoons dried thyme
1/8 teaspoon red pepper flakes
3 slices bread, diced (use 4 gluten-free since these loaves are usually smaller)
1/4 cup whole raw milk
1 teaspoon fresh thyme leaves (1/2 t dried)
Salt and freshly ground black pepper
3-4 slices bacon
Extra-virgin olive oil
2 bay leaves
2 red bell peppers, cored, seeded and finely diced
3/4 cup ketchup
1 tablespoon Worcestershire sauce
Kosher Salt and freshly ground black pepper


Essential Equipment:
Large Stainless Steel Stock Pot (2-3 gallon size)
13x18 baking sheet with sides
Cup Cake Pan
Small bowl and large bowl
Favorite Knife, tongs, ladle, large, long handled wooden spoon
Cutting Board
Cast Iron Pan
Zipper Bags
Tiny Cookie Scoop (like an ice cream scoop), opt

Recipe List:
My Favorite Meatloaf
Beef & Chicken Stock
Italian Meatballs
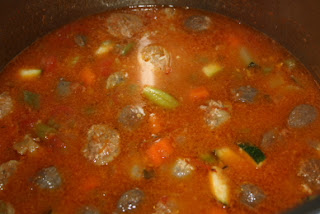
Italian Meatball Soup
Sausage Stew

Day One Through Three
  1. Day one: thaw meat for bone broths
  2. Day Two and Three: Make bone broths (chicken and beef) -  Freeze only what you are not going to use for the Soup and the Stew.
  3. Day Three: Take meat out of the freezer and thaw in the refrigerator

Day Three - Putting it together
  1. Make Meatloaf and the Tomato Sauce, Cool, package and freeze (we packaged in 2 serving sizes)
  2. Make the Meat Balls, Cool
  3. Assemble Italian Meatball Soup, cool, package and freeze (we packaged in 2 serving sizes)
  4. Assemble Smoked Sausage Stew, cool, package and freeze (we packaged in 2 serving sizes)
Congratulations! 
You now have 20 meals for two or 10 meals for four
in your freezer.

Italian Meatball Soup

This recipe actually comes in two parts.  First we have to make the meatballs and then the Soup.  Today we are making 16 servings of both dishes so some can go into the freezer for quick meals.  Frankly I believe that we consume to large of portions of meat in the US diet.  I think 3-4 of these meatballs per serving it more than enough.  That way a person can consume more vegetables.  Be aware of this as you portion your servings and you will have enough meatballs for spaghetti also.

Italian Meatballs
1/2 cup dry bread crumbs (gluten-free if you are intolerant)
2/3 cup raw milk
2 large free-range, organic eggs
1 pound pasture-raised ground pork
2 pounds grass-fed ground beef
1 cup grated parmesan cheese
1/2 cup fresh chopped flat-leaf parsley
2 teaspoons kosher salt
1 medium onion, finely chopped
4 cloves garlic, minced
Freshly ground black pepper.

Wisk bread crumbs and eggs together in a small bowl.  Add the bread crumbs and stir. In a large bowl, combine the bread crumbs, meat, Parmesan, parsley, salt, pepper, onion, garlic, until combined.


Using a small cookie scoop (looks like tiny ice cream scoop) form meatballs and place on baking sheet with sides to catch the fat. 


Bake at 350 degrees until the meatballs are just done (about 20 minutes turning once at 10 minutes).  Be careful to not over cook so the cheese melts out of the meatballs and they fall apart.  Remove from the oven and cool.


Italian Meatball Soup
18 Servings

2 cups uncooked macaroni
56 ounce, crushed or diced tomatoes
2 cups tomato Sauce
16 cups Beef stock/broth
2 cans Canellini Beans
2 Teaspoons Italian Seasoning
48 meatballs
4 carrots, sliced
2 onions, diced
4 celery stalks, chopped
4 cups green beans, fresh or frozen

Cook macaroni according to package instructions. Drain and set aside. Combine crushed tomatoes, tomato sauce, beef Broth, undrained beans, Italian seasoning, meatballs, carrots, onion and celery in a large stock pot. Bring to a rolling boil. Turn down to medium and cook for 20 minutes or until the vegetables are tender but not mushy.

Allow soup to cool completely. Stir in cooked macaroni and frozen green beans. Package the soup in meal sized portions. Large plastic freezer containers and freezer bags work well. Seal, label and freeze.

Serving Directions: Thaw completely. Warm on the stove or in the microwave. Top with shredded Parmesan Cheese

Tuesday, September 6, 2011

Sausage Stew

Serves 4-6

2 celery ribs, chopped
1 medium Onion, chopped
1 medium carrot, chopped
1 cup fresh green beans, snapped to 1 inch pieces (or use frozen)
1 clove diced garlic
1 small green pepper
1 cup diced zuchinni (opt)
2 Tablespoons Extra Virgin Olive Oil.


Cook the above for 2 minutes

Add 1 pound diced fresh tomatoes (or 14-16 oz can diced tomatoes)

Cook 1 minute

Add the above to a crock-pot along with:

1 1/2 cup chicken stock
1 pound Kielbassa or polish Sausage Cut into bite size pieces
(I used 1/2 pound pasture-raised Pork Polish Sausage and 1/2 pound grass-fed lamb brats)
2 Teaspoons dried oregano (or 4 teaspoons fresh)
2 teaspoons dried thyme
1/8 teaspoon red pepper flakes
and vegetables above

Simmer for 30 minutes.  Mix 1/4 cup all-purpose flour (gluten-free folks use your favorite flour blend) with the remaining 1/2 cup chicken stock and add to pot, Stir.


NOTE:  At this point you can simply place all in Crock-pot for 4-5 hours on low and serve.  OPTION TWO:  Do not add the flour.  Can in your pressure canner vs freezing for quick meals without having to thaw anything.

Cool and freeze in zipper bags (2 servings per bag)

Label with cooking instructions (Thaw, cook 3-4 hours on low in crock-pot), Name of dish and the date.

Keeping Fresh Herbs


DRYING FRESH HERBS

On probably more than one occasion you have not used all of the fresh herbs you received in your box and you hated to see them go to waste. Never fear most herbs can be easily dried or frozen for use at a later time.
Herbs that have low moisture content will dry better than those with high moisture content. For herbs with high moisture content freezing is the best way to keep them for future use. These herbs will retain more of their flavor when frozen: basil, parsley, cilantro, and chives. Herbs that are ideal for drying are: sage, mint, thyme, oregano, rosemary, and dill. The process is easy and is not time consuming.
The first thing to remember is moisture will cause herbs to mold and rot so if you rinse them be sure to pat them dry and let them sit for a bit before tying them into bunches. Inspect the branches and remove any leaves that look unhealthy. Also take off the leaves on the bottom one inch of the branch. Bundle 4-6 branches together at the stem and tie them with a string or rubber band. The stems will shrink as they dry so be sure you have it tied tightly. Hang the bunch of herbs upside down in a dry, airy room (the laundry room or bathroom would not be a good choice) for about 2 weeks. They are ready when the leaves will crumble easily in your fingers. Always store the entire stem in an airtight container like a jar or zip lock bag because they will retain a lot more flavor if they are not crushed until you are ready to use them. Fresh dried herbs should keep for about a year. When they start to lose their color they are also losing flavor.


FREEZING HERBS

The best way to preserve herbs that have high water content is to freeze them. Moisture in the leaves will often cause the herb to mold before it becomes dry enough to store. While the leaves will become limp when frozen they will retain their flavor. Some of the herbs that are best frozen are basil, chives, cilantro, mint, and tarragon. Herbs that have been frozen will retain their potency for several months.
Wash and pat or spin dry the leaves and lay them on a cookie sheet that has been covered with parchment paper. Freeze over night and then store in an air-tight container in the freezer. If you plan to use the herbs in soup or stew chop the herbs and put them in ice cube trays, cover with water and freeze. Store the cubes in a plastic bag in the freezer.

Sunday, September 4, 2011

THYME IDEAS

THYME IDEAS
We often hear that people don’t know what to do with the fresh herbs so here are a few ideas to help you use the fresh thyme this week.
• Use fresh thyme leaves when you season steak or pork chops before grilling
• Put sprigs of fresh thyme in the cavity of a chicken before roasting
• Add fresh thyme leaves to vinaigrette or creamy dressings
• To easily remove fresh thyme springs from soups or stews tie them in a bundle with twine before you put them in
• Add fresh thyme leaves to bread crumbs before breading fish
• Add fresh thyme leaves to softened butter and use it for making garlic bread, or herb butter is a great addition to grilled steaks
• Add fresh thyme leaves to scalloped potatoes or use them as a topping for baked potatoes
• Make herb infused oil or vinegar and give it as gift
• Add fresh thyme leaves to sautĂ©ed or roasted vegetables

Wednesday, August 17, 2011

Cooking from Storage

How awesome it is to have things in my freezer or my shelves that I can whip up a quick meal when I need it.

Today, for supper, we are starting with Chicken Livers.  We raise our own chickens every year.  I would NEVER, NEVER, NEVER eat liver from an animal that I didn't raise, or didn't know how it was raised.  While the liver of animals is a very healthy organ for us to consume it IS NOT HEALTHY unless it comes from an animal raised in a healthy way.  My chickens are raised on grass and bugs and supplemented with ORGANIC grains.

When we butcher our chickens we reserve the livers in 8 ounce packages which is perfect for the two of us and put them in the freezer.

Also from my storage:

  • Green onions raised this spring, chopped and frozen
  • Potatoes from my garden
  • GF All-Purpose Flour Mix  (My new all-purpose flour mix: Mix together 3 cups brown rice flour, 3 cups tapioca flour, 2 cups sorghum flour or Almond flour, and 1 part millet flour)
  • GF Cream of Soup Mix (see previous post)
  • Dried Shitake Mushrooms (very healthy for you...pratically medicinal)
  • Homemade Chicken Stock, in the freezer (Check back tomorrow for this)
  • Raw Milk
  • Cucumber Salad that I have in the refrigerator (Check back tomorrow for this)
NOTE:  Since I'm cooking for two, I use two small crockpots and this works well for me.


Crock-pot Chicken Livers for Two
8 ounces Chicken Livers
1/4 cup + 2 tablespoons GF Flour, divided
1/8 teaspoon pepper
2 slices bacon, diced
2 green onions with tops, chopped
1 cup chicken stock
2 tablespoons raw milk
2 oz Dried Shiitake Mushrooms
2 Tablespoons white wine
  • Mix 1/4 cup flour and pepper in a small bowl.  Cut chicken liver into bite-size pieces, add to flour in bowl and toss to coat well. 
  • Fry bacon pieces in large skillet; remove when brown into crock-pot.  Add flour-coated chicken livers and green onion to bacon fat in skillet; saute until lightly browned but not cooked through.  Remove livers and onion into crock-pot.
  • Pour chicken stock into skillet and stir into dripping.  Whisk in 2 tablespoons flour.  Stir until thickened.  Add wine and pour into crock-pot 
  • Cover and cook on high for 45 minutes and then on low for 2-3 hours.
  • Serve over mashed potatoes, noodles or rice.

Crock-pot Creamed Corn for Two
8 ounces frozen sweet corn
2 ounces creamed cheese
2 tablespoons Butter
1 teaspoon honey
2 teaspoons raw milk
Salt and Pepper to taste
  • Place corn in small crock-pot. 
  • Dice Creamed Cheese and butter.  Add to crock-pot along with remaining ingredients. 
  • Cook on high for 45 minutes.  Reduce to low and cook another 2-3 hours.

NOTE:  This made enough for three servings for us, so one serving was placed in a glass bowl with lid and put in the freezer.  My husband takes these little meals to work with him.
    TONIGHTS MEAL:  Chicken Livers with gravy served over mashed potatoes, Creamed Corn Casserole,  Sliced Tomatos (in season),  Cucumber Salad, large glass of raw milk.

    Friday, August 12, 2011

    Making Gluten-Free TORTILLAS and Chicken Enchiladas

    Having to cook gluten-free has been life changing.  First, I feel so much better than I did before.  Being sick effected me physically AND mentally.  Second, it makes me have to think about my food and finally I have to make most things from scratch (which I was pretty much doing anyway).

    Today I actually made Gluten-Free Tortillas.  They weren't pretty and a tortilla press is on my wish list, but they ARE tortillas and not bad, if I do say so myself.  It was a royally messy job however, so I'm really hoping that the tortilla press comes off the wish list and into my kitchen sooner than later.


    My Tortillas were rolled out by hand and fried on my pancake griddle proving that anything can be done if you want to bad enough.  I had some left-over roast chicken to use up and company coming for dinner.  I wanted to make Chicken Enchiladas.  Since I can't afford the price of Gluten-Free Tortillas and besides out here in the boonies there aren't stores that carry that kind of thing, I had to make my own.  I have to thank the Gluten Free Cooking School Tutorial on making Tortillas for giving me the courage to even attempt this feat in the first place.  Recipe can be found at that site.

    The next project was..................Cream of Chicken Soup.  Again I'm on my own since I can't use 'canned' stuff anymore.  Here's my recipe for the Cream of Soup Mix that I made today.  I think you'll love it!!!

    1 cup powdered milk
    3/4 cup cornstarch
    2 tablespoons onion flakes
    1 teaspoon dried basil
    1 teaspoon dried thyme
    1/2 teaspoon pepper

    Mix all the ingredients together and store in an airtight container.  To make 1 can of cream soup, mix 1/3 cup of dry mix with 1 1/4 cups chicken stock.  Cook in sauce pan until thick.  Add 1/4 cup mushrooms, chicken, etc, etc. to make the type of mix you want.  For cream of tomato I would use tomato juice in place of or in combination with the chicken stock.  This makes enough for 9 cans of soup substitute.  I doubled it and put it in a glass jar on my pantry shelf with a label telling how to fix up a 'can' firmly attached to the jar.


    Now that the soup mix is safely on my shelf and the Tortillas made I was ready to create the Chicken Enchilada's.  Because I had so much left over chicken and we love Chicken Enchilada's I made enough for dinner with company, some for Mike's lunches, another meal and enough of the chicken mix (I only had 16 tortillas) to use for several other meals which I safely tucked (labeled and dated) in the freezer.  Serve with a SUPER SALAD.


    Easy Chicken Enchiladas

    3 cups shredded Cheddar Cheese, divided
    2 cups shredded Monterrey Jack Cheese
    3 cups chopped, shredded, roast chicken
    2 cups sour cream
    Equivalent of 1 can condensed cream of chicken soup
    1/8-1/4 cup diced Jalapeno Pepper
    2 tablespoons finely chopped onion
    1/4 teaspoon pepper
    1/4 teaspoon salt
    10 (8-inch) Flour (Gluten-Free) Tortillas, warmed

    1. Prepare Cream of Chicken Soup in a large sauce pan.  Reserve 1 cup soup.
    2. Add 2 cups cheddar and the Monterrey Jack Cheese, chicken, sour cream, soup, Jalapeno Pepper, onion, pepper and salt.
    3. Spoon about 1/2 cup off center on each tortilla; roll up.  Place seam side down in a buttered 12x9x2 inch baking dish.  Pour reserved soup over top.
    4. Cover and bake at 350 degrees for 20 minutes.  Uncover; sprinkle with remaining cheddar cheese.  Bake 5 minutes longer or until cheese is melted.  Let stand for 10 minutes before serving.

    Monday, August 8, 2011

    THE PANTRY CHALLENGE

    We go through several periods of cleaning as homemaders.  There's the typical Spring and Fall Cleaning that everyone knows about but often can get to.  This week I'm challenging you to do some cleaning of your freezer and pantry shelves.

    We all have things hidden in our freezers or that we purchased for a special meal and then didn't get to that meal for whatever reason and now that special ingredient is setting on our pantry shelves. 

    WELL LET'S GET TO IT.

    First of all I hope that you have taken a marker and put the date on EVERYTHING you put in the freezer or on your pantry shelf. 

    If not

    • You have a bigger task than I thought
    • Start doing it today!
    By marking things with a date you'll know better how to rotate the things that are in your refrigerator, freezer and on your pantry shelves.


    Now this is a photo I found at http://www.reynoldsnet.org/preparedness/Pantry_shelf.html of a beautiful pantry, well organized with items in plain view.  I wish my pantry was so organized.  An organized pantry and freezer can save you money but if you don't know where things are and you purchase more, then the first spoils you've defeated your purpose.

    I believe in being frugel and buying in bulk if you use enough of the product to warrant it.  I also believe in being prepared for emergencies.  Emergencies can include loss of income for short or long periods of time such has happened to us on occasion.

    THE CHALLENGE IS

    to eat from the pantry, your cellar and/or your freezer for the entire month of August.  If you have a garden or frequent the farmers market you'll have fresh fruits and vegetables to supplement.

    We have a beef that is going to be ready for the freezer in the next couple of months so we need to eat up what is in the freezer before more is added.

    JOIN ME IN THE CHALLENGE AND SHARE WITH ME WHAT YOU'VE FOUND IN YOUR PANTRY/FREEZER AND WHAT YOU ARE GOING TO COOK WITH IT!

    Please also share with us your storage and organizational tips.

    Tuesday, July 26, 2011

    BLT MAC N CHEESE

    This is a new favorite for my hubby and the grandkids loved it too!


    BLT MAC N CHEESE

    4 slices thick cut bacon cut into 1" pieces (or use a cup of diced hot dogs or ham)
    12 ounce Rotinni Pasta (Gluten-Free if needed)
    2 1/4 cup milk
    6 ounce cream cheese
    1/2 teaspoon tumeric
    2 cups shredded cheddar
    6 ounce cherry tomatoes
    Salt and Pepper
    1/2 cup yogurt
    1 Tablespoon cider vinegar
    Romaine Lettuce finely chopped
    1. Preheat oven to 375 degrees.
    2. Cook Bacon pieces and drain
    3. Cook Pasta according to Package directions
    4. Bring Milk to simmer; whisk in the tumeric and stir in the cream cheese until melted.
    5. Add Pasta, meat & Tomatoes; season with salt and pepper.
    6. Put in 9 x 13 casserole and bake for 20 minutes
    7. Combine yogurt & vinegar, season with salt and pepper. Add thinly sliced lettuce, toss to coat. Serve with Mac N Cheese

    Zuchinni Tomato Toss


    Serves 2-3 - * Note: This would be really good with some fresh Mozzerella!

    2 small Zuchinni, thinly sliced
    1 tomato, cut into wedges
    1/2 pepper, cut into slices (A yellow pepper would be pretty in this)
    1/4 cup red onion, thinly sliced into half rings
    1 tablespoon pure Apple Cider Vinegar (not the 'flavored' kind)
    1/8 Teaspoon Salt
    1/8 Teaspoon Pepper
    1/8 Teaspoon Garlic
    3 Tablespoons Olive Oil
    Lettuce

    Combine zucchini, tomatoes, green pepper and onions. Toss lightly. Combine vinegar, salt, pepper, garlic salt and salad oil. Mix well and pour over vegetables. Chill for several hours, stirring occasionally. Serve on lettuce, if desired. Yield: 3-4 servings

    Monday, July 25, 2011

    Beets, Beets and More Beets

    I harvested some Beets today.  Not wanting to do the same old thing with them I decided that they would be best used in some different ways.  If you go to my GRANDMA FARMERS GARDEN blog, I've explained the value of beets for your diet.

    How to Choose Beets
    Beets are in season from June to October,but are available in most stores all year round. Choose firm smooth beets. They should be a beautiful color when you rub a bit of the dirt away.

    Beet Juice Blends
    Don’t like beet juice by itself? Try these recipes for tasty blends. You can blend with other fruits or vegetables for extra nutrition and flavor. This can be important for some people as beets have oxalic acid which can cause kidney stones. Blending with another veggie or fruit will reduce the concentration, or eat a calcium product in addition to your beet juice.

    Using a Juicer
    Use whole,raw beets. Wash them extremely well or peel the skin first. Cut into size recommended for your juicer.

    With Blender
    You can also use a blender to make beet juice. Clean and peel the beets. Chop or grate finely. Add the finely grated beets with ¼ cup water or juice to the blender. Blend well. Strain through a cloth to remove large pieces if desired. But remember,this contains fiber and beneficial nutrients,so find a way to add them to your diet.

    Beet and Fruit Blend
    Blend together 1 beat with leaves,1 apple and 1 pear.
    Beet and Veggie Blend
    Blend together 1 beet,1 carrot,1 apple,1 cup green tea,1 orange,and ½ inch fresh peeled ginger root.
    Tropical Blend
    Blend together 1 beet,1 cup pineapple,and ½ cup papaya
    Drink Your Juice Blend immediately to utilize the nutrients before they are lost. If you want to make enough for several days,freeze in individual portions. Thaw overnight in the refrigerator for a refreshing beverage for breakfast.

    Beet Kvass
    Beet Kvass is a Ukranian drink that no household was ever without. Here’s how to make up 2 quarts of the traditional tonic:
    3 beets,peeled and chopped*
    ¼ cup whey
    1 tablespoon sea salt
    Filtered water
    Put the beets,whey and sea salt in a 2 quart glass jar or container and fill with filtered water. Stir and cap. Let it set on the counter at room temperature for 2 days,then transfer to the refrigerator.
    Drink a 4 ounce glass in the mornings and evenings for a regenerating tonic. You can also use beet kvass in place of vinegar in your salad dressing recipes or add it to soups.
    *Note: Don’t use grated beets because they will ferment too rapidly. You will have alcohol content instead of the valuable lactic acid that is noted for its medicinal qualities.


    Sweet Potato and Beet Chips with Garlic Rosemary Salt
    2 Sweet Potatoes
    2 large beets
    1 clove garlic, minced
    1 teaspoon finely minced fresh rosemary leaves
    2 tablespoons salt
    10 cups coconut oil

    1. Wash the vegetables and dry very well.  Set aside
    2. In a small bowl combine the garlic, rosemary and salt.  Set aside.
    3. Warm the oil in a large pot over high heat to 350 degrees (use a deep-fry thermometer)
    4. Trim 1-inch off the end of each sweet potato.  Using the V-slicer or Mandoline, slice the sweet potatoes into very thin slices, about 1/8-inch thick.  Trim 1-inch off the root end of the beets.  Using the V-slicer or mandoline slice the beets into very thin slices, about 1/8-inch thick
    5. When the oil is hot add about a quarter of the sweet potato slices.  Let fry until golden and the bubbling has almost completely subsided, about 2-3 minutes.  Using a mesh sieve or slotted spoon remove the ships to a paper-towel-lined baking sheet.  Sprinkle with some of the garlic, Rosemary and salt mixture.  Continue with the remaining sweet potatoes.
    6. Transfer to a serving plate.
    7. Fry 1/4 of the beets.  Let fry until curled at the edges and most of the bubbling has subsided, about 3-4 minutes.  Transfer the beets to another paper-towel-lined baking sheet and sprinkle with salt mixture.  Continue with the remaining beets.  Let cool and transfer to a serving plate.

    Ukrainian Red Borscht Soup Serves 4
    8 ounces pork sausage
    1 very large beet, peeled and shredded
    1 large carrot, peeled and shredded
    1 large baking potato, peeled and cubed
    1 1/4 teaspoon coconut oil
    1/3 cup chopped onion
    2 ounces tomato paste
    1/4 cup water
    1/4 medium head cabbage, cored and shredded
    1/2 cup diced tomato
    1 large clove garlic, minced
    salt and pepper to taste
    1/2 teaspoon white sugar
    1 tablespoon sour cream for each serving (topping)

    1. Crumble the sausage into a skillet over medium-high heat.  Cook and stir until no longer pink.  Remove from the heat and set aside.
    2. Fill a pot halfway with water and bring to a boil.  Add the sausage, and cover the pot.  Return to a boil.  Add the beets, and cook until they have lost their color.  Add the carrots and potatoes, and cook until tender, about 15 minutes.  Add the cabbage and tomatoes.
    3. Heat the oil in a skillet over medium heat.  Add the onion, cook until tender.  Stir in the tomato paste and water until well blended.  Transfer to the pot.  Add the raw garlic to the soup, cover and turn off the heat.  Let stand for 5 minutes.  Taste, and season with salt, pepper and sugar.
    4. Ladle into serving bowls, garnish with sour cream and fresh parsley.

    Cherry Frozen Yogurt

    This is a simple homemade cherry frozen yogurt made with fresh cherries and Greek yogurt.  Again it can be easily divided to make enough for just one or two people.  We sprinkled some pistachios on top.

    1 pound fresh cherries, pitted
    2 cups plain, full fat Greek yogurt
    1/2 cup sugar (or 1/4 cup honey)
    2 tablespoons fresh lemon juice
    2 teaspoons vanilla extract

    Place cherries, yogurt, sugar, lemon juice and vanilla in the bowl of a food processor or into a blender and purĂ©e. Transfer to a freezer-safe bowl and cover. Whisk mixture vigorously every 30 minutes until just frozen throughout, about 2 to 3 hours. (Whisking helps to break up the ice that forms when freezing.) Or, use your table top ice cream maker (just takes about 20-25 minutes).  The frozen yogurt is ready when it's too thick to whisk. Stir with a spatula and store in an airtight container. This homemade frozen yogurt is best enjoyed the same day you make it.

    Salmon and White Bean Salad

    Now here's a summer meal that's cool and light!
    While we were eating I made some Cherry Frozen Yogurt in our little counter top ice cream maker.  You don't need a ice cream maker to make this great iced Yogurt but it made it a quick treat.  ENJOY!!


    This salad makes enough for 4 but can easily be halved for 2 people.  Serve this crunchy and refreshing salad in lettuce leaf cups or on bread.  Bib lettuce works especially well.

    1 cup dried baby Lima beans
    1 tablespoon Dijon mustard
    3 tablespoons fresh lemon juice
    1/4 teaspoon freshly ground black pepper
    2 (6-ounce) cans Salmon (you can also use solid white albacore tuna), drained
    4 radishes, halved and thinly sliced
    1 stalk celery, thinly sliced

    1/4 cup julienned red pepper, 1 inch pieces
    1 bunch watercress or Arugula, stems removed and leaves chopped (about 1 1/2 cups packed leaves)
    1/4 cup chopped chives


    Soak beans overnight. Drain and rinse. Place beans in a large pot with 1 quart water and bring to a boil. Reduce heat and simmer about 45 minutes or until tender. Drain and let cool.  I placed the beans in a pan with twice the amount of water brought it for a boil and simmered 3 minutes. Pour into a crock-pot and cook on low over night.  Drain the next morning and cool.  You can also make extra for later and freeze the beans in portions.

    In a large bowl, whisk together mustard, lemon juice and pepper. Add your choice of fish, radishes, celery, red pepper, watercress or Arugula, chives and cooled beans and stir until evenly coated.


    Adapted from a Recipe found at www.wholefoods.com

    Sunday, July 24, 2011

    Maple Baked Beans

    1 pound dried navy beands, rinsed, picked over
    1 teaspoon kosher salt
    8 cups water

    Combine the above ingredients and soak for 3-4 hours.  Drain.  Add an additional 8 cups water and cook on med-low for 1-3 hours.  Keep the beans covered with water during cooking time so additional water may be needed.  There are alot of things that will cause a varied cook time including the age of the beans.  Do not boil.  Simmer slowly until they are tender but not mushy.

    6 bacon slices, chopped
    1 large red onion, chopped
    1 cup water
    1 cup pure maple syrup
    1/2 cup ketchup
    1/2 cup pure apple cider vinegar (not just flavored)
    2 tablespoon Dijon mustard

    Saute Bacon in same pot over medium heat until crisp, about 6 minutes.  Transfer bacon to to paper towel-lined plate.  Add onion and saute over med-high heat until tender, about 5 minutes.  Add 1 cup of water, maple syrup, ketchup, vinegar, drained beans and reserved bacon being careful not to splatter.  Simmer uncovered until mixture thickens slightly, stirring occasionally, about 30 minutes.  I put them in a crock-pot on low with the lid OFF for 4 hours.  Season beans to taste with salt and pepper.

    Pork Spareribs with Maple BBQ Sauce

    6 pounds pork spareribs
    2 tablespoons coconut oil
    2 medium onions, finely chopped
    4 carlic cloves, minced
    2 cups diced tomatoes
    1/4 cup Gluten Free Soy Sauce
    Crushed dried red pepper flakes
    2 tablespoons pure apple cider vinegar (not just flavored)

    Position rack in center of oven; preheat to 400 degrees.  Sprinkle ribs with salt and pepper on BOTH sides.  Place ribs in pan, covered, bake for 45 minutes.  Cool slightly.  Drain juices.  Cut into individual servings.

    While cooking heat oil in medium saucepan over medium heat.  Add onion and saute until tender, about 10 minutes.  Add garlic and saute 1 minute.  Add tomatoes,  maple syrup, soy sauce and red pepper flakes to blender or food process and process.  Add onions and garlic, process until smooth.  Pour into saucepan, bring to boil  Reduce heat to low and simmer until suace thickens slightly, about 20 minutes.  Stir in vinegar.  Season to taste with salt and pepper.

    Dip ribs into sauce.  Grill, meating side up for 15 minutes.  Baste with sauce.  Turn.  Grill another 20 minutes.

    Saturday, July 23, 2011

    Cucumber and Grated Carrot Salad

    2 medium-size Cucumbers
    2 medium-size carrots
    Creamy Dill Dressing

    1. Peel the cucumbers and slice them in half length-wise.  Scoop out the seeds with a spoon and discard them.  Slice the cucumbers in 1/4-inch-thick slices and divide them equally among serving plates
    2. Peel the carrots and grate them.
    3. Mix the carrots and cucumbers together.
    4. Stir in the dressing.

    CREAMY DILL DRESSING
    1/2 cup full fat greek yogurt
    1/2 cup mayonnaise
    1 teaspoon red wine vinegar
    2 teaspoons olive oil
    1 clove garlic, minced
    1 tablespoon minced fresh dill (or 1 1/2 teaspoon dried)
    Freshly ground pepper to taste

    Mix all the ingredients together in a medium-size bowl until well blended.  Chill until ready to use.

    Baked Parmesan Tomatoes

    4 tomatoes, halved horizontally
    1/4 cup grated Parmesan cheese
    1 teaspoon chopped fresh oregano
    1/4 teaspoon salt
    Freshly ground pepper to taste
    2 teaspoons extra-virgin olive oil

    Preheat oven to 450 degrees
    Place tomatoes cut-side up on a baking sheet.  Top with Parmesan, oregano, salt and pepper.  Srizzle with oil and bake until the tomatoes are tender, about 15 minutes.

    Gluten-Free Peanut Butter Cookies

    1 large egg
    3/4 cup sugar
    1 teaspoon baking soda
    1 cup creamy unsweetened peanut butter
    1/2 teaspoon gluten-free vanilla extract
    1/3 cup chocolate chips (optional)

    Preheat oven to 350°F and line a baking sheet with parchment paper.

    Beat together egg, sugar, baking soda and vanilla in a standing mixer with the paddle attachment or with a hand-held mixer. Beat in the peanut butter. Stir in chocolate chips if using.

    Drop dough by teaspoonfuls onto prepared baking sheet, pressing lightly with the back of a fork. Bake for 10 minutes, until lightly set. Transfer to a wire rack to finish cooling.

    Zuchinni Cupcakes with Caramel Frosting

    Adapted from a TASTE OF HOME recipe

    3 eggs
    1-1/3 cups sugar
    1/2 cup grapeseed oil o
    1/2 cup orange juice
    1 teaspoon almond extract
    2-1/2 cups your favorite gluten free flour mix
    1/2 teaspoon Xanthum Gum
    1 tablespoon ground cinnamon
    2 teaspoons baking powder
    1 teaspoon baking soda
    1 teaspoon salt
    1/2 teaspoon ground cloves
    1/4 teaspoon Nutmeg
    1-1/2 cups shredded zucchini


    CARAMEL FROSTING:

    1 cup packed brown sugar
    1/2 cup butter
    1/4 cup grass-fed, raw milk
    1 teaspoon vanilla extract
    1-1/2 to 2 cups confectioners' sugar

    1. In a large bowl, beat the eggs, sugar, oil, orange juice and extract. Combine dry ingredients; gradually add to egg mixture and mix well. Stir in zucchini. 
    2. Fill paper-lined muffin cups two-thirds full. Bake at 350° for 20-25 minutes or until toothpick inserted near the center comes out clean. Cool for 10 minutes before removing to a wire rack.  
    3. For frosting, combine the brown sugar, butter and milk in a saucepan. Bring to a boil over medium heat; cook and stir for 2 minutes or until thickened. Remove from the heat; stir in vanilla. Cool to lukewarm.
    4. Gradually beat in confectioners' sugar until frosting reaches spreading consistency. Frost cupcakes. Yield: 1-1/2 to 2 dozen.


    A Summer Menu


    Sunday
    Maple BBQ Ribs
    Maple Baked Beans
    Grilled Corn
    Spinach Salad
    Peach Crisp

    Monday
    Salmon White Bean Salad
    Cucumber and Onions

    Tuesday
    BLT Mac N Cheese
    Zuchini & Tomato Toss

    Wednesday
    Meatloaf with Tomato Relish
    GF Squash Casserole
    Sliced tomatoes
    Cucumber & Onions
    GF Banana Nut Muffins with Caramel Frosting

    Thursday
    GF Parmesan Chicken
    Spaghetti Noodles with Tomato Sauce
    California Blend Vegetables


    Friday
    Grilled Grass-Fed Steak
    Sweet Potato Cabbage Slaw
    Cucumber and Onions
    Caramel Apple Gingerbread Upside Down Cake (Gluten-Free)

    Saturday
    Summer Squash Stir Fry
    Green Beans

    Thursday, July 21, 2011

    Gluten Free Chocolate Angel Food Cake

      I'm trying this cake today

    • 1 cup your favorite gluten-free blend
    • ½ cup cornstarch
    • 1 teaspoon xanthan gum
    • 1 ½ cups sugar plus 2 tablespoons
    • ¼ baking cocoa
    • 1 ½ cups eggs whites, room temperature
    • 1 ½ teaspoons cream of tartar
    • ¼ teaspoon salt
    • 1 ½ teaspoons vanilla extract
    1. Sift together flour, cornstarch, xanthan gum, ¾ cup plus 2 tablespoons sugar, and cocoa. Set aside
    2. In a large mixing bowl beat egg whites, cream of tartar, salt, and vanilla until foamy.
    3. Add remaining ¾ cup sugar 2 tablespoons at a time.
    4. Continue beating until stiff peaks form.
    5. With a rubber scraper fold in flour mixture a few tablespoons at a time. Mixture will be thick but do not over beat the mixture. Gently fold in the flour.
    6. Spread into a 10 inch tube pan (not a bundt pan)
    7. Bake at 350 for 40-45 minutes or until the top of the cake springs bake when lightly touched.
    8. Immediately invert the cake and leave upside down in the pan to cool.
    9. Once cooled run a knife a long the sides of the pan and remove cake.
    10. Serve with chocolate whipping cream below if desired. This is also good with fresh fruit like raspberries.


    Chocolate Whipped Cream

    • 3 cups of whipping cream
    • 1 cup powdered sugar
    • 1/2 cup baking cocoa
    Sift powdered sugar and cocoa. You must sift or whisk this to avoid lumps in the whipped cream. Whip cream in a mixer on medium speed for about 1 minute. Then slowly add sugar/cocoa mixture to whipped cream about 2 tablespoons at a time until the whipped cream is whipped well. Do not over whip or you will have chocolate butter.

      Tuesday, July 19, 2011

      White Bean Crab Cakes and Peachy Corn Salsa

      When you cook gluten-free adding fiber to your meals in the form of legumes is idea but legumes are not just for gluten-free.  Legumes also stableize blood sugars, reduce protien costs and are just plan good for you!  These recipes were adapted from www.gultenfreecookingschool.com


      White Bean Crab Cakes
      (Serves 4 – 6 )
      1 c. onion, diced
      1/2 c. celery, diced
      1/2 c. red bell pepper, diced
      1 Tbsp. garlic, minced
      1/2 lb. white beans, cooked and drained*
      1/2 lb. crab meat*
      2 green onions, green parts only and sliced
      1/4 c. Parmesan cheese
      2 Tbsp. parsley, minced
      3/4 tsp. stone ground mustard
      1/2 c. mayo or Vegannaise
      1/2 c. bread crumbs
      1 1/2 Tbsp. Old Bay Seasoning

      1. Saute the onions, celery, bell pepper, and garlic in a little olive oil or water over medium low heat until the vegetables are tender.

      2. Mix the vegetables and all other ingredients in a large bowl. Some of the beans will fall apart when you do this, and that’s just what you want. If you’re using canned beans, give half of them a spin in the food processor before adding them in.

      3. Form the mixture into small cakes, approximately 2.5 inches in diameter. You can either pan-fry them with a little olive oil and a medium-hot skillet or bake in the oven at 350 F until they are golden. I prefer the texture of the pan-fried cakes, but the oven baked cakes hold together better.

      4. Serve the cakes with tartar sauce, or  Savory Peach and Corn Salad below.

      5.  Crab cakes can be cooked and frozen for later meals and/or lunches.

      *Can't afford Crab?  Use all White Beans and it will still come out perfectly!

      Savory Peach & Corn Salad

      2 cans of corn (11 oz), drained (feel free to use fresh if you have it)
      1 ripe peach, diced
      1/8 c. celery, diced
      1/8 c. pecans, minced
      1/2 red bell pepper (can substitute green pepper)
      mayonnaise or Vegannaise, to taste
      red wine vinegar, to taste
      parsly, minced , to taste

      Mix all ingredients and chill for 30 minutes, if you can wait that long.

      P.S. Sorry to be vague with some of the amounts. Sometimes I like a little bit of mayo and vinegar and sometimes I want more. I’d suggest starting with a small amount of mayo and then gradually working up to the amount you want. Then start with the vinegar and parsley and do the same.

      P.P.S. To choose a ripe peach, hold the peach near your nose and sniff. If you smell peachy goodnes, then it’s ripe. If not, put it back and keep looking.


      Stuffed Patty Pan Squash


      Stuffed Patty Pan Squash for Two


      1/4 cup quiona, rinsed well
      Pinch Saffron Threads (opt)
      2 small Pattypan Squash (fits in palm of hand)
      1/2 pound ground beef
      1/4 Cup diced red pepper
      1/4 cup diced yellow pepper
      2 green onions thinly sliced (include greens)
      2 tablespoons shredded Parmesan cheese
      1/4 cup shredded Mozzarella Cheese
      1 1/2 Tablespoons chopped Fresh Basil
      1/2 teaspoon fresh time leaves, chopped
      1/2 teaspoon fresh oregano leaves, chopped
      1 teaspoon fresh parsley, chopped
      1/2 teaspoon lemon zest

        1. Cut stem off squash and place upside down in 1/2 inch of water in a casserole dish.  Cook 1/2 hour at 350 degrees until squash is soft (test with fork) but not mushy.
        2. Add the quiona and 1/2 cup water to small saucepan and set over med-high heat.  Bring to boil, add saffron then reduce to simmer and cook, covered for 30 minutes.
        3. Brown ground beef with onions and pepper.
        4. Combine Quinoa, veggies, Parmesan Cheese and herbs
        5. Cut the top edge of each squash off and remove the seeds.
        6. Stuff the squash Bottom with the meat mixture, top with mozzerella, return squash top
        7. Bake inPre-heated 375 degree oven for 15 minutes.
        8. Remove top, enjoy both the filling and it's container!

      Monday, July 18, 2011

      This Weeks Healthy Gluten-Free Menu-Week Three-July

      You don't have to be Gluten-Free to benefit from this weeks menu!  Give it a try.  I'm going to be posting recipes the day after each meal.  This gives you plenty of time to study the menu and create your grocery list for next week.


      SUNDAY
      Sweet & Sour Chicken Wings with Fried Rice

      MONDAY
      Stuffed Patty Pan Squash
      Peach Blackberry Cobbler

      TUESDAY
      White Bean Crab Cakes with Peachy Corn Salsa and left-over Monday desert

      WEDNESDAY
      Left-over from Sunday meal and Peanut Butter Cookies

      THURSDAY
      Sweet Potato & Greens Casserole & Gluten Free Zuchinni Cupcakes

      FRIDAY
      Learning to make Crab Ragoon, Egg Rolls and another Phillipino Dish at my friends house tonight.  I'm taking the Gluten-Free Coconut Cake!  Yummmm

      SATURDAY
      Grilled Grass-Fed Steak, Grilled Corn, Cucumber Carrot Salad, and Baked Parmesan Tomatoes (all veggies fresh from the garden) plus some left-over Cake from yesterday.

      Sunday, July 17, 2011

      What's In The Refrigerator Breakfast

      Gluten Free Breakfast


      Here's another version of "My Favorite Breakfast"  Being Gluten-Free means eating better!  Since I'm not eating toast/fiber with this breakfast I had some kidney beans (the fiber) in the refrigerator so I grabbed a handful of those.  There was some left-over, grass-fed steak in the refrigerator too, so I diced that up with a banana pepper, some yellow summer squash, diced red onion and diced new potatoes (from the garden).  All that was sauted up.  Then I added three of my organic, farm fresh, free range eggs whisked with a tablespoon of water and added it to the pan.  After the eggs were just set I added some shredded Mexican blend cheese.  Took the picture before I topped it with fermented salsa.  Served with a couple of slices of melon and a cup of fresh, raw goat milk.


      Can anyone say Yumm?


      When you are Gluten-Free you have to make sure that you are getting the fiber, vitamins and minerals you are missing by not eating bread and/or wheat products.

      Friday, July 15, 2011

      Gluten-Free Peach Blackberry Cobbler


      I picked some Blackberries today.  Just enough to make Peach Blackberry Cobbler with the peaches in my refrigerator.

      6 peaches, peeled pitted, and cut into 1-inch chunks
      1 tablespoon cornstarch
      2 1/2 tablespoons brown sugar
      1/2 teaspoon lemon juice
      tiny pinch salt
      1  cup blackberries
      Topping, as follows

      Preheat the oven to 350 degrees.  In a bowl, combine the peaches, cornstarch, brown sugar, lemon juice and salt tossing gently.  Carefully fold in the blackberries and transfer the mixture to a 4-cup baking dish.  Set Aside.

      Topping:
      1 cup of your favorite gluten-free all purpose baking flour
      1/2 teaspoon xantham gum (if not already in your flour)
      1/4 teaspoon salt
      2 Tablespoons brown sugar, packed
      1 teaspoon baking powder
      1/8 teaspoon dired ginger
      1/8 teaspoon cinnamon
      1 pince nuteg
      3 tablesppon cold unsalted butter, cut into pieces (I like to freeze mine and grate it into the bowl)
      1/3 cup plus 1 tablespoon milk
      1 1/2 teaspoon sugar

      In a mixed fittes with a paddle attachment, mix the flour,  xantham gum, salt, brown sugar, baking powder, ginger, cinnamon and nutmeg.  Add the butter and mix.  Add 1/3 cup milk and mix just until  combined.  Turn out the dough onto a lightly floured surface and knead a few times to smooth it out.  Form into a ball and roll out into the shape and saze of the baking dish, about 1/2-inch thick.  Place dough on top of the prepared fruit.

      Brush the top of the dough with the remaining tablespoon of milk and sprinkle with the granulated sugar.  Place the cobbler on a sheet-pan to catch any juices that may boil over.  Bake until the top is golden brown and juices are bubbling, 25-30 minutes.  Let cool slightly before serving.  Serve warm or at room temperature with whipped cream or ice cream.

      Tuesday, July 12, 2011

      Bacon Wrapped Steak and Fresh Green Bean Salad

      Want a fancy restaurant meal on a budget, cooked at home?  Here's something easy for you.  You can easily double these recipes as necessary.


      Bacon Wrapped Steak for Two

      6 large garlic cloves, peeled
      2 Tablespoons  olive oil
      2 Tablespoons unsalted butter, cut into small chunks
      Kosher salt
      2 teaspoons chopped chives
      1/4 teaspoon coarsely ground black pepper
      1/4 teaspoon dried thyme leaves
      2 (4- to 5-ounce) grass-fed, filet steaks, about 1 inch thick (I used Sirloin)
      2 very thin slices of lean bacon
      6-inch wooden skewers or toothpicks, soaked in water 10 minutes and patted dry

      Directions:

      1. Preheat oven to 400 degrees F. Place peeled garlic and olive oil in 1-cup, ovenproof ramekin, soufflé dish or custard cup. Cover dish tightly with aluminum foil and place in oven.

      2. Roast on center rack until garlic is golden and very tender and soft when pierced with knife, about 30 minutes (start checking cloves after 20 minutes and then every 5 minutes until done).

      3. With slotted spoon, remove garlic from bowl and reserve oil. Place garlic, half of the reserved oil, butter and 1/8 teaspoon salt in food processor or blender and process, pulsing machine on and off for 30 seconds or less until garlic is coarsely chopped and blended with butter and oil.

      4. Transfer garlic butter to small bowl and stir in 1 teaspoon of the chives. (Garlic butter can be prepared 1 day ahead. Cover with plastic wrap and refrigerate. Bring to room temperature 30 minutes before ready to use.)

      5. When ready to cook steaks, oil a grill rack and prepare grill. In small bowl, stir together a pinch of Kosher salt, coarsely ground black pepper and thyme. Rub both sides of each filet with some of this seasoning.

      6. Wrap each steak around its sides with 1 slice of bacon. Skewer bacon in place with wooden skewer or with 2 to 3 toothpicks.

      7. Grill steaks over LOW HEAT until lightly charred on the outside and until bacon is cooked, about
      3-5 minutes per side for medium-rare. When done, remove steaks from fire and place on warm serving plate. Remove toothpicks.

      8. Top each steak with 1 generous pat of roasted garlic butter and sprinkle with some of remaining chives. Butter will start to melt and season the steaks. Serve immediately.

      Green Bean and Squash Salad
      Makes 2 servings

      1/2 cup fresh green beans, snapped into 1 inches pieces
      3 fresh plum tomatoes, sliced
      4 ounces fresh mozzarella cheese, cut into 1/2-inch cubes
      Pinch coarse black pepper
      1/4 cup Parmesan & Roasted Garlic Salad Dressing
      1/2 cup yellow squash, cut into slices
      1/4 cup pitted black olives, sliced
      1 1/2 ounces fresh basil, chopped

      Combine all ingredients in a large salad bowl. Cover. Place in refrigerator to cool for at least 1 hour.


      If you like, serve with the GLUTEN-FREE CORN BREAD I gave you the recipe for the other day!

      Monday, July 4, 2011

      Tuscan Chicken

      Now you can create Olive Garden's TUSCAN CHICKEN in your kitchen in 30 minutes or less.

      TUSCAN CHICKEN (serves 4)

      Start your water for the Penne or Linguine Pasta you will be using.  Be sure to add a pinch of salt to the water.  Bring water to a boil.  Add pasta and cook according to your instructions.  Gluten Free pasta cooks differently so be sure you read the instructions.  We like Quinoa Pastas but are going to be learning to make our own.

      In your wonderfully seasoned cast iron skillet place 2 tablespoons olive oil and 1 tablespoon butter.

      Dredge 4 small chicken breasts (diced or cut in half) in your all purpose Gluten-Free Flour Mix (flatten chicken breasts in a zipper bag just a bit with another cast iron skillet until all the same thickness then coat with flour)

      Brown chicken breasts on both sides approximately 2 minutes, then place in a warm oven while you continue.

      Dice 3 cloves garlic, reserve.  Thinly slice 2 red peppers.

      Add an additional 1 tablespoon olive oil and 1 tablespoon butter to your pan.  Add garlic, peppers and 1 cup mushrooms to the pan.  Saute on Medium for 1-2 minutes.  Add 2 tablespoons flour mix.  Stir and coat vegetables.  Add 1/2 cup (or so) good white wine and stir.  The sauce will thicken as you allow it to cook a minute or two.  Add 2 cups raw milk or cream and stir to incorporate.  Allow to cook until thickened.  Add 1 teaspoon Italian Seasoning and 6-8 cups fresh organic baby spinach and allow to wilt slightly.  Add 1/2 cup Parmesan cheese and pepper to taste.

      Push the vegetables to the side and add the pasta to the skillet.  Stir the pasta to coat.

      To serve:  Place pasta in the center of each dish.  Place Chicken pieces on top of the noodles then spoon vegetables and sauce over top.  Sprinkle with Parmesan Cheese.

      ENJOY!

      Gluten Free Apple Pancakes

      Grama Farmers Cooks Gluten Free

      With so many in my family going Gluten-Free (including myself) my desire is to create HEALTHY gluten-free foods. What I have found is that so much of the gluten-free breads have gone the way of the American SAD diets and the flour mixed suggested for use are sadly lacking in nutrients. Everyone knows today that we should be using whole grains in our diets and I'm determined to find success in using WHOLE GRAIN gluten free flours.

      Today I used a recipe exactly as I found it off the Internet. It made wonderful thin pancakes that were also tasty. I found them to be way to sweet for my liking and since I am diabetic (something that may change now that I'm gluten-free) I need to watch the carbs and sweetness often used to make gluten-free products palatable.

      My current Flour Mix is: 3 parts organic brown rice flour (ground fresh), 3 parts corn or tapioca starch, 2 parts organic sorghum flour (can also be ground fresh), and 1 part GramMasala. Be sure all your flours are gluten free.

      Here's the recipe after I tweeked it.

      Spiced Apple Pancakes (yield one dozen)

      2 2/3 cup Flour mix (spooned into the cup to avoid packing)
      2 tsp baking powder (gluten and aluminum free)
      1/2 tsp salt
      1/2 tsp ginger
      1/2 tsp cinnamon (Ceylon has more of the ingredients to curb blood sugar spikes)
      1/4 tsp nutmeg
      1 small apple grated and mixed into the flour
      COMBINE IN BOWL AND RESERVE
      2 large, farm fresh, free-range, organic Eggs
      1 1/2 cup fresh raw goats milk (or cows milk)
      1/4 cup unsweetened applesauce
      WHISK INGREDIENTS TOGETHER FOR ABOUT 1 MINUTE

      Combine the wet and dry ingredients. Cook 1/4 cup at a time in a cast iron skillet to which you have added a teaspoon of butter or coconut oil. When bubbles appear flip the pancake and cook the other side.

      Top with butter, pure maple syrup, fresh whipped vanilla whipped cream, apple sauce, apple butter or caramelized apple chunks (as pictured)


      We don't need a dozen pancakes, or so I thought. The left over pancakes can be used as wraps for sandwiches. Freeze with wax paper between or store in the refrigerator. Children would love sausage dogs for breakfast. Simply cook sausage links on low until fully cooked. DON'T BROWN THEM. Insert a stick, dip in the batter and deep fry like a corn dog. These would freeze well for a quick breakfast during the week.

      ATTENTION:

      Buckwheat flour is amazing! It's gluten-free and helps to level blood sugars. That's why I LOVE, LOVE, LOVE Buckwheat pancakes. Next time I will use 1 2/3 cup flour mix and 1 cup freshly ground buckwheat flour in place of the 2 2/3 cups flour mix. Additionally, I will use 1/2 cup yogurt and 1 cup raw milk in place of the 1 1/2 cup milk.

      My Favorite Breakfast

      My Favorite Breakfast


      My Favorite Breakfast is what I call COUNTRY EGG SCRAMBLE. Of course I use Organic Ingredients whenever possible.

      COUNTRY EGG SCRAMBLE
      1 tablespoon red pepper (diced, from freezer)
      1 tablespoon onion (diced, from freezer)
      1 tablespoon mushroom (diced, from freezer)
      1 tablespoon zuchinni, diced
      Place all this in a small skillet (I use cast iron) with 1 tablespoon coconut oil (google the benefits of coconut oil)

      When cooked tender chrisp add:
      2 Farm Fresh, Free-Range, Organic Eggs
      Several twists from your pepper mill

      Cook and Scramble. When almost set add:
      2 tablespoons shredded raw milk cheddar cheese (I keep this shredded in the freezer too)

      MY CHILDREN WON'T EAT THIS! Yes they will!!! You train the pallet of your children. If you begin to feed them these kind of breakfasts when they are babies they will eat it when they are older and be much healthier for it!